
Uploading a database is the first step in analyzing data in DataTile. You can upload survey data from SPSS, Excel, CSV, TSV, and other supported formats. After upload, the database can be organized and refined in the Meta-Editor without changing the source file.
This article explains how to create a database, upload data files, and prepare the dataset for analysis.
Mandatory system role to be able to load databases: Database Creator. Ask your server Supervisor for the role assignment if you need it.
How to upload a database
Compress your data using ZIP before uploading. Certain formats, such as CSV, can achieve significant size reductions of up to 10 times or more. By zipping your data files, you'll experience faster upload speeds and circumvent file size restrictions.
-
Open DataTile Drive.
-
Create a folder (optional, but highly recommended).
-
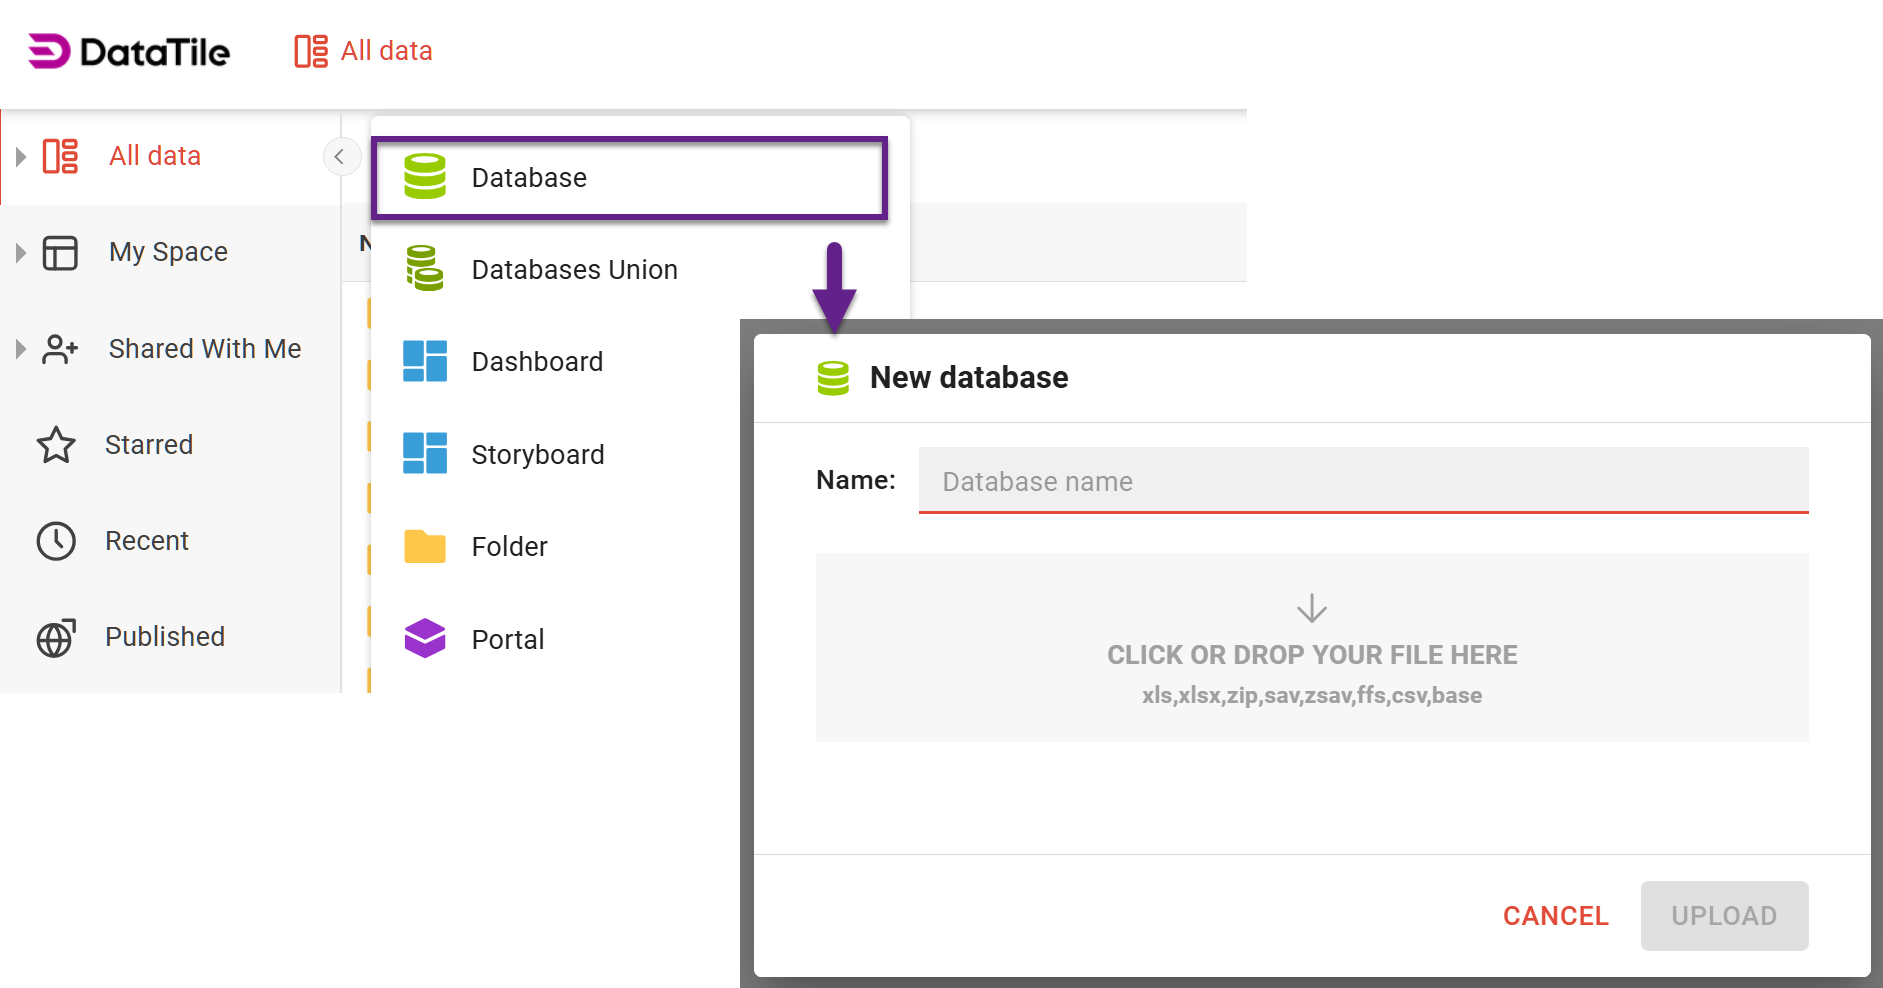
Create a new database: click the '+' icon in the top menu and select 'Database’.
-
Select a data file. In the pop-up box, type in the name of a database, or it will be auto-generated from the file.
-
Upload the file.
You can drag and drop a file into the space to upload it. Loading of multiple files is forbidden.
Database upload with a codebook is performed using a single ZIP file.
A codebook (data map) helps refine the data structure and provides additional information, including variable types, labels, and data mappings.
Supported file formats
DataTile supports the following formats of data files:
|
SPSS |
*.sav, *.zsav |
|---|---|
|
Excel |
*.xlsx, *.xls (note that support of XLS will be ceased in the future) |
|
Text formats |
*.csv, *.tsv |
|
Parquet |
It’s in development and will become available soon. |
|
IBM360 |
A legacy format that is mostly used for big syndicated databases. |
-
Read our tips on preparing SPSS files.
-
Read our tips on preparing Excel files.
Upload additional datasets (survey waves)
DataTile supports the loading of multiple volumes united in a single database. You can add as many additional files as needed. After the first dataset is uploaded, all further management is handled in the DATA Panel.

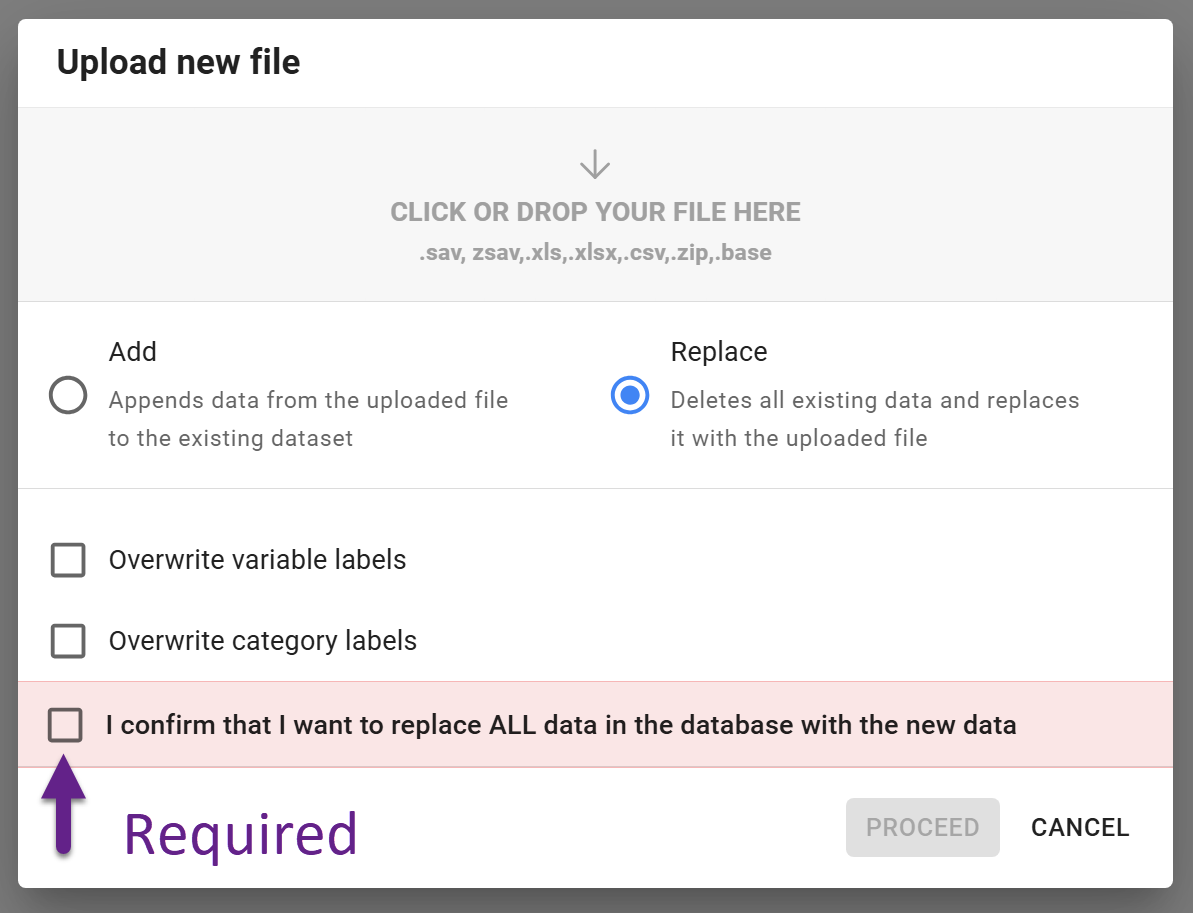
Here, you can add new volumes or replace existing ones as needed. Both operations can be performed using the ‘Upload new file’ button.
When replacing, all previous data will be deleted. You need to give explicit consent to this.
All volumes are stored separately. Their visibility can be managed individually.