
After uploading data, you can view detailed information about the uploaded volumes and delete, add to, or replace data.
All of this is managed in the DATA panel within the database settings. You can access it either through the settings menu in Data Drive or by clicking the 'cog' icon in DVI.
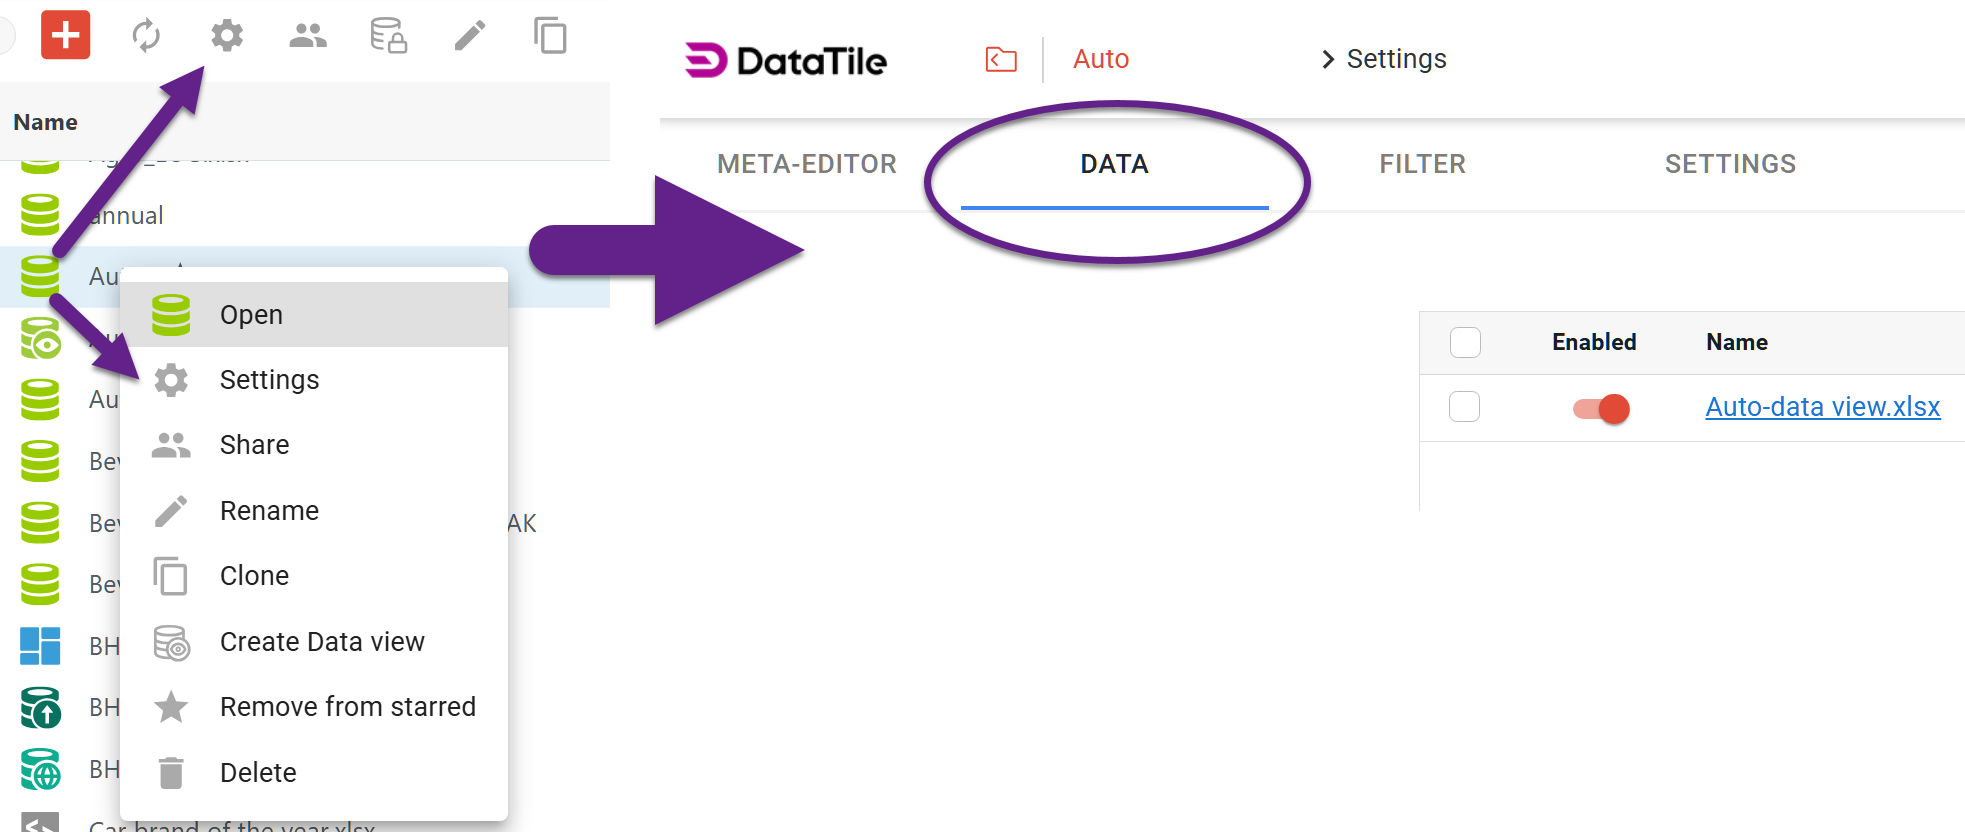
Data panel interface
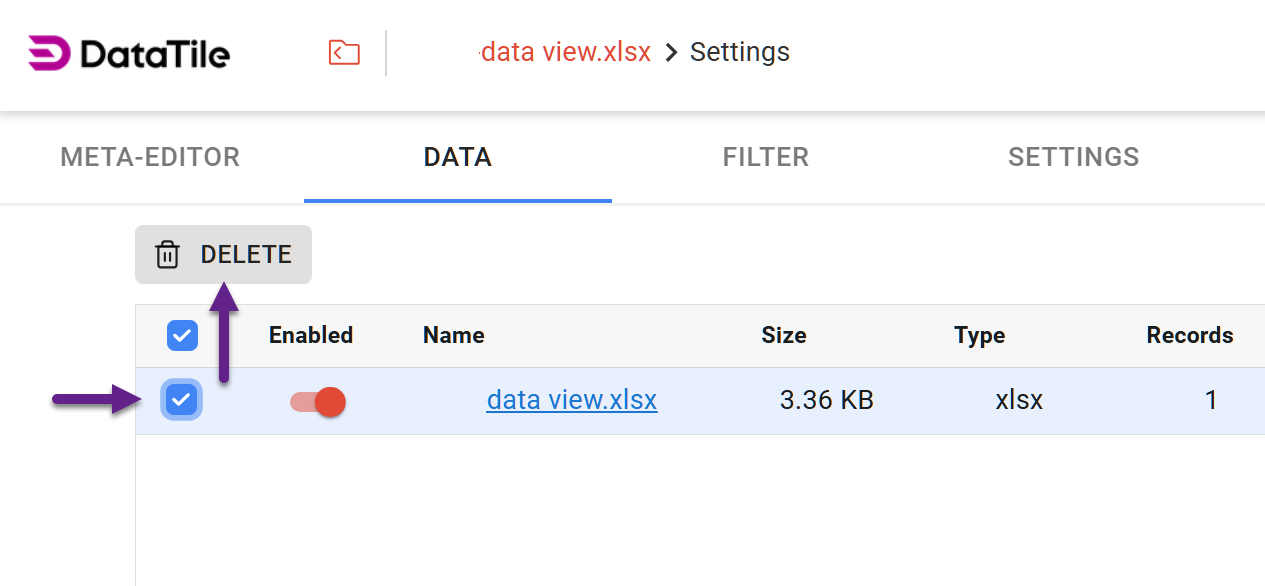
In this panel, you can view detailed information for each uploaded volume: name, size, date of upload, etc. This information can’t be edited.

Available actions:
-
Volume visibility settings: use the toggle to include or exclude a volume from the Meta Editor.
-
Delete volumes: select at least one volume to activate the delete button. Multiple volumes can be selected and removed at once.
-
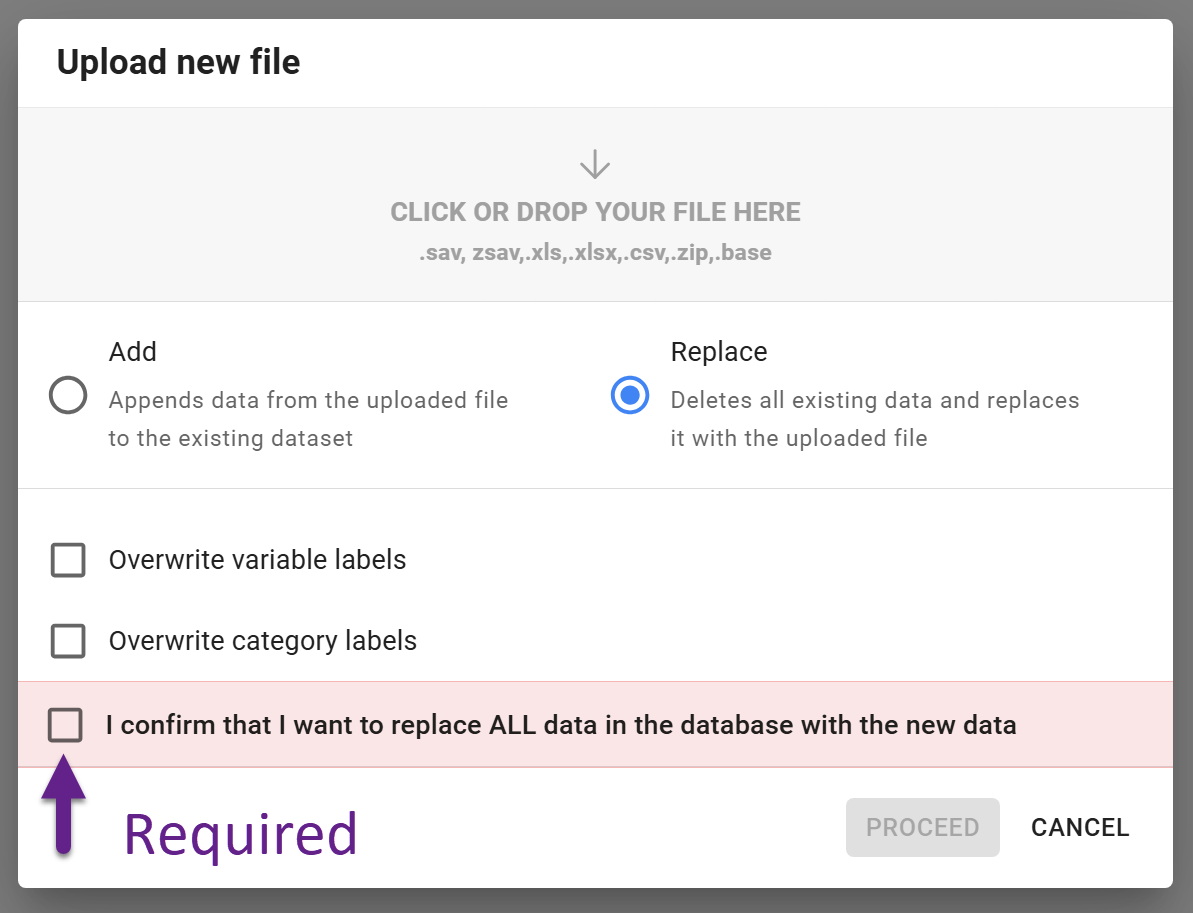
Upload or replace volumes: Add new volumes or replace existing ones as needed. Both operations can be performed using the ‘Upload new file’ button.
-
Click the button,
-
Drag and drop a new file in the upload area (or use the ‘[plus’ icon on the right).
-
Select option - add or replace.
-
Please note that replacing a volume updates the entire dataset. To prevent accidental replacement, you must confirm the action by selecting the required checkbox.
-
Optionally, you can choose to overwrite variable and category labels during the replacement process.