
After uploading data, you can view detailed information about the uploaded volumes and delete, add to, or replace data. All of this is managed in the DATA panel within the database settings. You can access it either through the settings menu in Data Drive or by clicking the 'cog' icon in DVI.
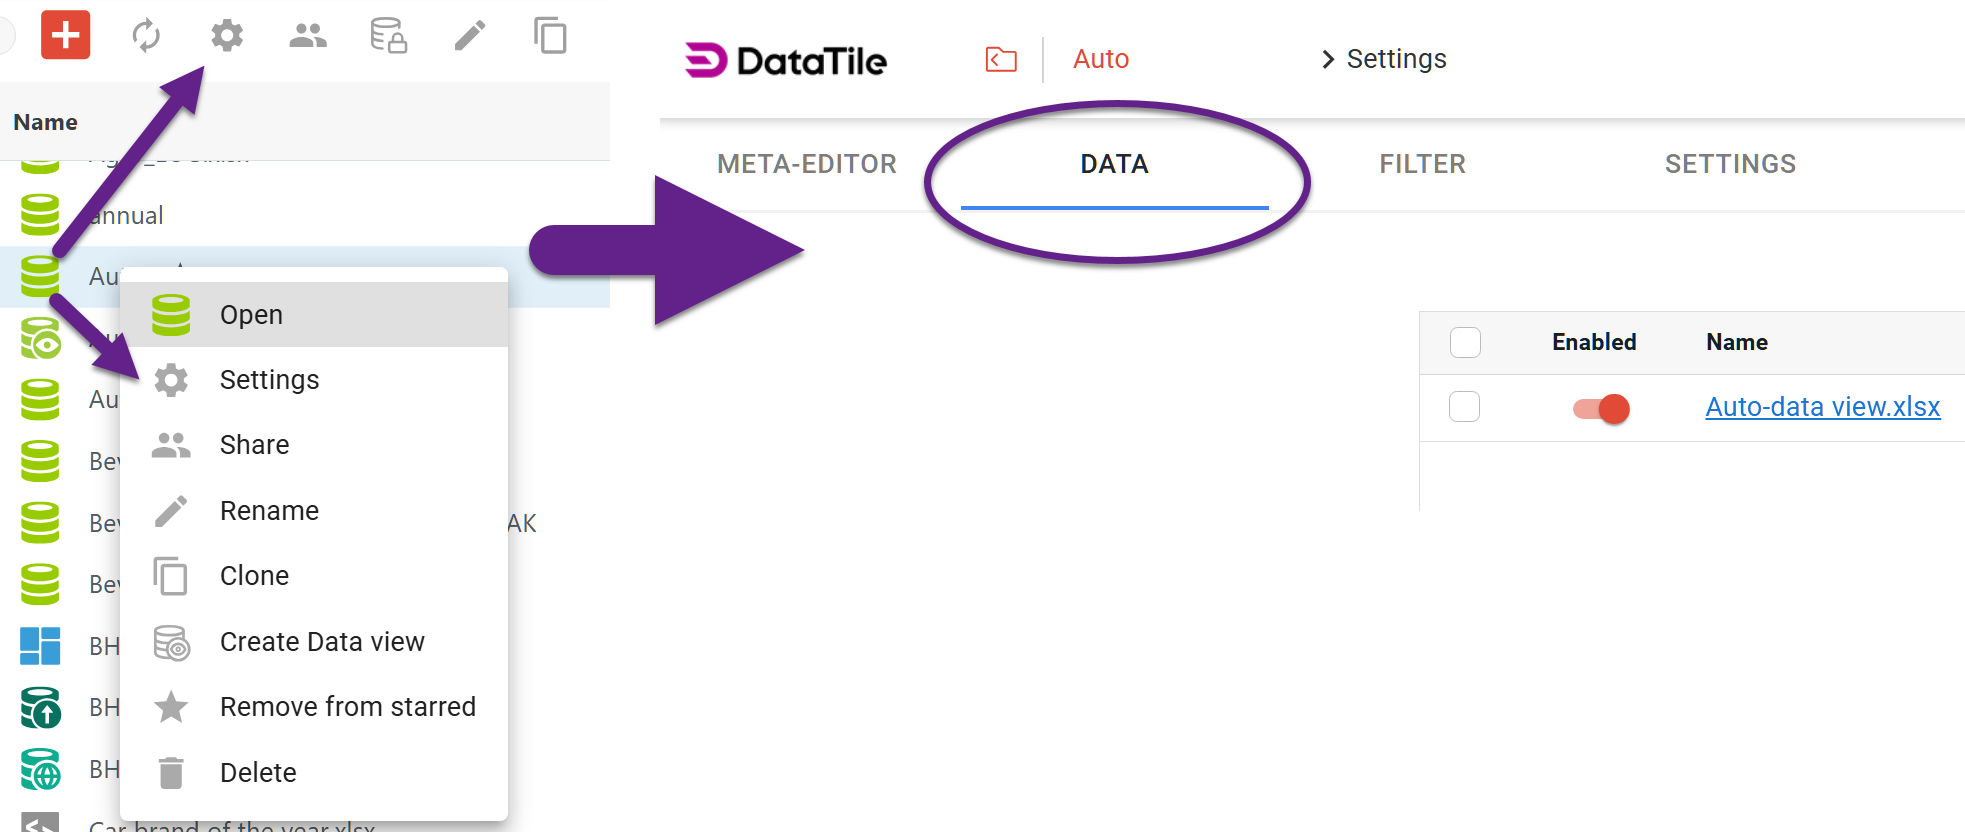
Data panel interface
In this panel, you can view detailed metadata for each uploaded database. This information can’t be edited.

-
Enabled – whether the database is currently enabled;
-
Name – database name;
-
Size – file size;
-
Type – database type;
-
Records – number of records in the database;
-
Status – current upload status;
-
Uploaded at – upload date and time;
-
Uploaded by – the user who uploaded the database;
-
Duration – time required to upload the database.
If a database is still being uploaded, the Status column displays the estimated remaining upload time together with a progress indicator.
How to download a database
If the database name is displayed in blue, you can download it by clicking its name.
Names shown in black indicate databases that cannot be downloaded. This typically occurs when the database was imported from a dump.
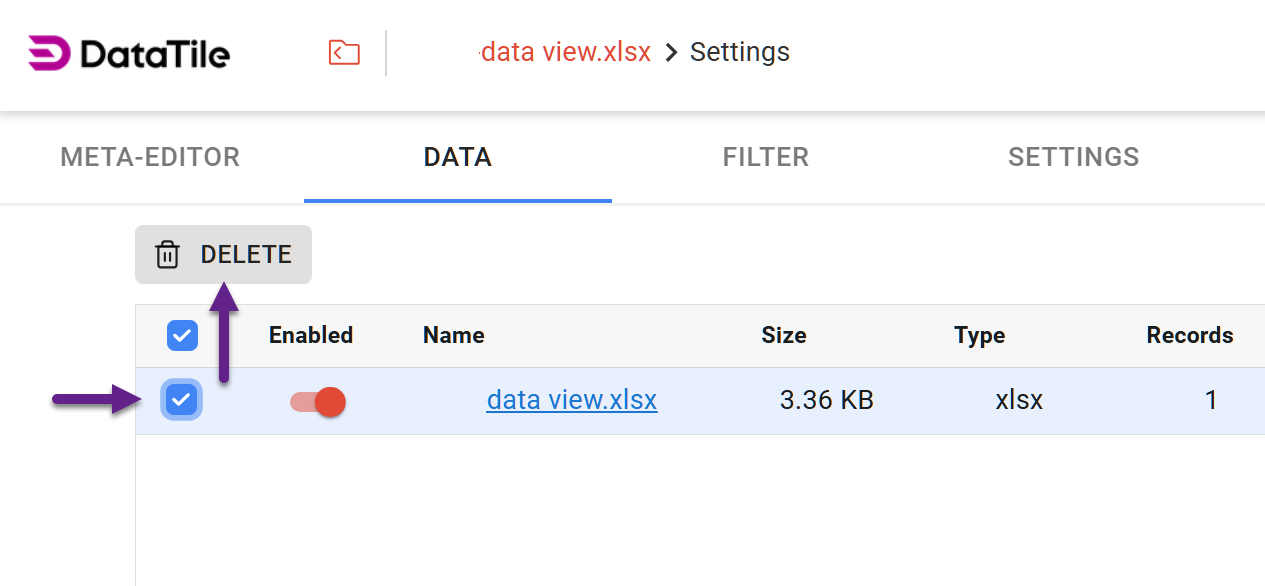
How to delete a database
If a database is no longer needed, it can be deleted.
To delete volumes, tick at least one checkbox next to the ‘Enable’ toggle to activate the deletion button. Tick all the datasets you need to delete, then click the ‘Delete’ button above the list.
Since deletion is irreversible, be careful when selecting volumes to delete. The system will ask you to confirm the action, and the confirmation dialog will list all selected files so you can verify your selection before proceeding.
How to enable/disable datasets
Instead of deleting a database, you can manage its Enabled status.
Databases with Enabled status are visible in the Meta Editor and available for analysis. Disabled datasets are hidden but remain stored in the project and can be re-enabled at any time without being uploaded again. This is particularly useful when multiple versions of the same database have been uploaded. Previous versions can be disabled while remaining available for future verification or comparison if needed.
To enable or disable a dataset, use the toggle switch to the left of its name.
-
A gray switch indicates that the database is disabled.
-
An orange switch indicates that the database is enabled.
If there is only one active database in the project, the system may not allow you to disable it. In this case, first enable another database, then disable the current one.
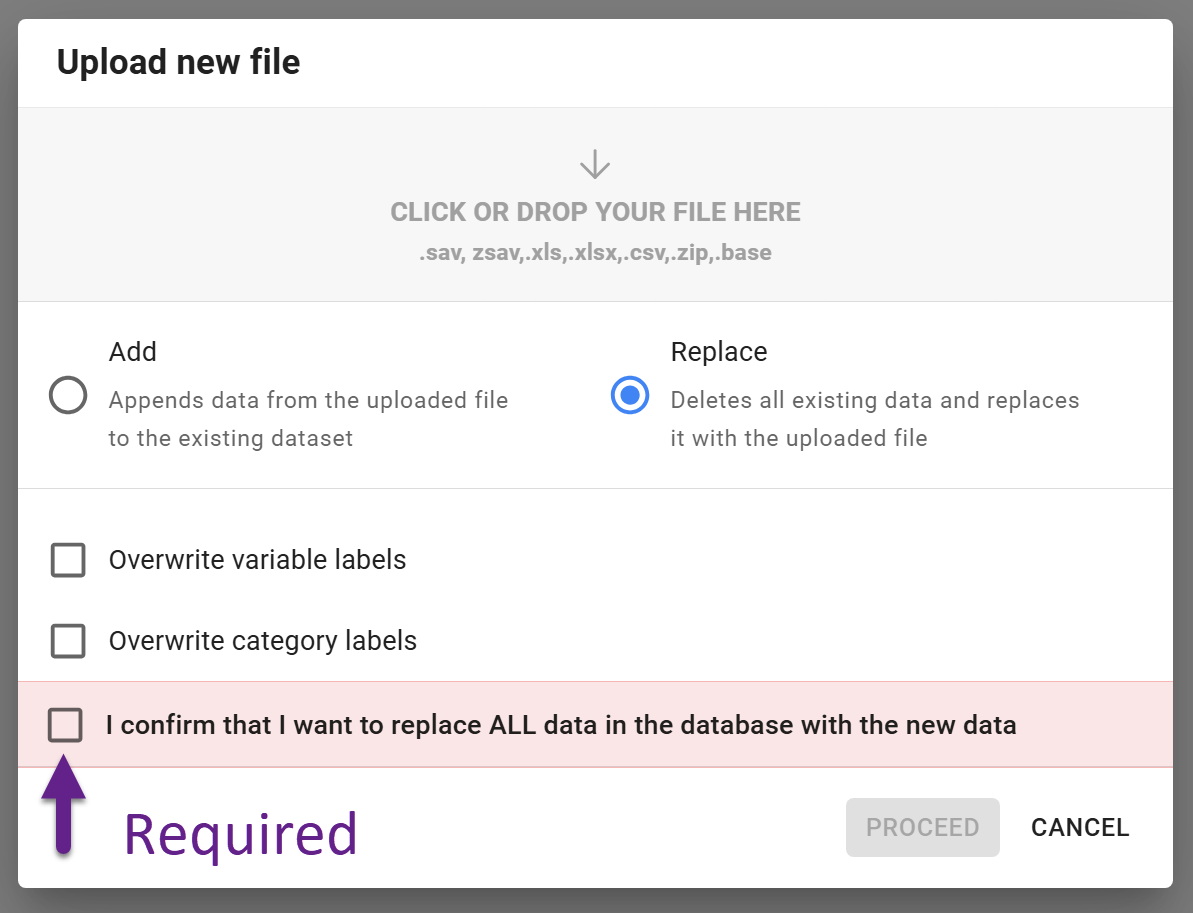
Uploading a new database
To upload a new database, click the ‘Upload new file’ button. The upload window provides two main options: Add and Replace. It’s important not to confuse these options, because they serve different purposes.
After choosing the upload mode, click the upload area or simply drag and drop the database file into the window.
Adding a new wave (Add)
For standard uploads of each new wave, always use Add. This is the default upload method. Use Add if a new wave is uploaded as a separate database. Existing databases remain unchanged.
For example, if Waves 1–24 have already been uploaded and you want to add Wave 25 as a separate file, choose Add. The project will then contain all waves from 1 through 25.
When uploading a file in Add mode, DataTile automatically checks the new database against previously uploaded waves. If any conflicts are detected, a notification window opens displaying the list of identified issues. For more information on resolving upload conflicts, see our dedicated article on conflict handling during database uploads.
Replace
The Replace option is used in two scenarios.
1. Replacing with a cumulative database
Use Replace when uploading a cumulative database that already contains all previous waves together with the new one.
For example, if a single SPSS file contains Waves 1–25, upload it using Replace. In this case, you are not adding a new wave, but replacing the existing databases with an updated cumulative database that contains all waves.
After the replacement, the project will use this new cumulative file. Make sure that the cumulative database actually contains all required waves. If the file contains only Wave 25, then after using Replace, data for Waves 1–24 will no longer be available in the project.
Please note that replacing a volume updates the entire dataset. To prevent accidental replacement, you must confirm the action by selecting the required checkbox.
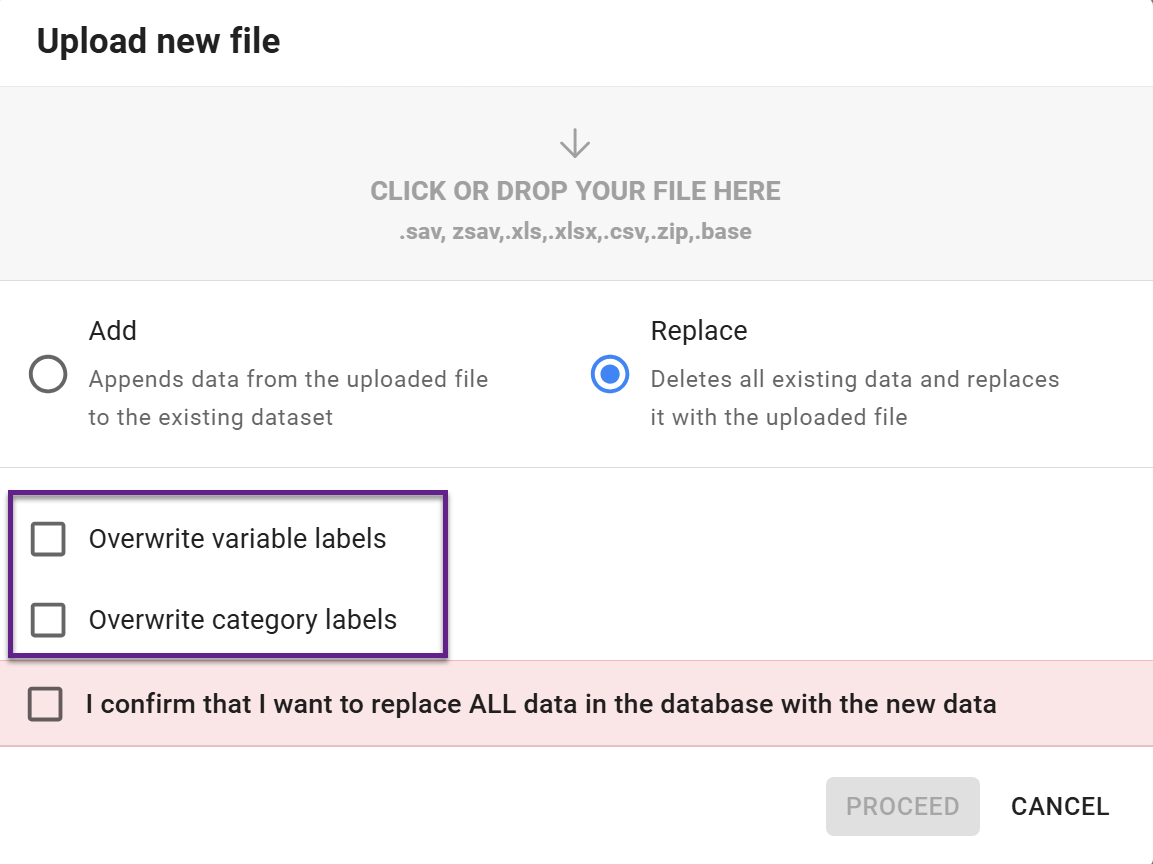
2. Replacing Labels
Replace is also used when you need to update variable labels, brand names, or statement labels. For example, if you intentionally changed a brand name or the wording of statements.
The recommended workflow is:
-
Download all existing databases to your local computer.
-
Upload the updated database using Replace.
-
Select the required options in the upload dialog.
-
After the upload is complete, upload the previous databases again using Add.
Relatec articles
Checking database conflicts during upload